iOS Guide
Full reference: configuration options, native tabs, WKWebView toggles, device builds, signing.
This guide takes a standard Wails desktop app and runs it on iOS Simulator or Android Emulator. You do not need to change your Go code. The same main.go builds for all targets.
Time to complete: 15–30 minutes (most of that is toolchain installation on first run)
If you don’t have one yet, create a fresh project:
wails3 init -n mymobileappcd mymobileappConfirm the desktop app works first:
wails3 devOnce it opens, quit and move on. Everything that runs on desktop also runs on mobile — you won’t need to touch main.go or any Go code for this guide.
macOS (iOS builds are macOS-only)
Full Xcode — not just command-line tools. Install from the App Store, then:
sudo xcode-select -s /Applications/Xcode.app/Contents/Developersudo xcodebuild -license acceptGo 1.25+ and npm (already installed if you ran wails3 init)
Run wails3 doctor to verify — it lists the iOS SDKs it can find.
Launch the app
wails3 task ios:runThat’s it — this builds your app, boots a simulator if one isn’t already running, and launches it.
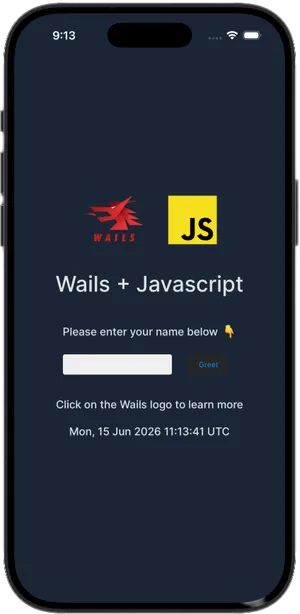
When it launches, your unmodified desktop app is running on the iOS Simulator — same main.go, same frontend:
Stream logs
In a separate terminal:
wails3 task ios:logs:devThis tails the simulator log, filtered to your app. fmt.Println and log.Println output appears here.
Inspect the WebView
In Safari: Develop → Simulator → your app. The full Web Inspector works — console, debugger, network panel, everything.
Make a change
Edit any frontend file (frontend/src/main.js, index.html, etc.) and re-run wails3 task ios:run. Wails rebuilds the frontend and relaunches the app.
For Go changes: also re-run wails3 task ios:run. Go recompilation is incremental, so only changed packages rebuild.
wails3 task ios:xcodeThis opens build/ios/ in Xcode. You can use Xcode for device deployment, advanced profiling, or managing provisioning profiles. Wails regenerates the Xcode project on each build, so don’t modify the generated files directly.
You need the Android SDK, NDK, and a JDK. The easiest way is Android Studio, or the command-line tools:
Install the Android command-line tools
Download from developer.android.com/studio#command-line-tools-only, unzip to ~/android-sdk/cmdline-tools/latest/.
Install SDK components
sdkmanager "platform-tools" \ "platforms;android-34" \ "build-tools;34.0.0" \ "ndk;26.3.11579264" \ "emulator" \ "system-images;android-34;google_apis;arm64-v8a"Create an emulator
avdmanager create avd \ --name wails \ --package "system-images;android-34;google_apis;arm64-v8a" \ --device pixel_7Set environment variables
Add to ~/.zshrc or ~/.bashrc:
export ANDROID_HOME=~/android-sdkexport ANDROID_SDK_ROOT=~/android-sdkexport PATH=$PATH:$ANDROID_HOME/platform-tools:$ANDROID_HOME/cmdline-tools/latest/binReload: source ~/.zshrc
Install a JDK
# macOSbrew install openjdk@21export JAVA_HOME=$(brew --prefix openjdk@21)
# Ubuntu/Debiansudo apt install openjdk-21-jdkexport JAVA_HOME=/usr/lib/jvm/java-21-openjdk-amd64
# Windows (scoop)scoop install openjdk21
Run wails3 doctor to confirm everything is found.
Launch the app
wails3 task android:runOn first run this:
libwails.so via the NDK cross-compilerStream logs
In a separate terminal:
wails3 task android:logsThis runs adb logcat filtered to your app. fmt.Println output appears here.
Inspect the WebView
Open Chrome and navigate to chrome://inspect. Your app’s WebView appears under Remote Target — click inspect to open DevTools.
Make a change
Edit any file and re-run wails3 task android:run. Gradle’s incremental build means only changed code recompiles.
Your main.go didn’t change at all. Wails handled everything:
Taskfile.yml in your project contains ios:* and android:* tasks that drive the platform-specific toolchain.GOOS=ios or GOOS=android with the appropriate GOARCH and sysroot.frontend/dist/ is embedded in the Go binary and served in-process. No localhost server is needed.Your app already works, but it looks like a desktop app on a phone screen. A few small changes make a big difference.
Mobile screens are narrower and use different input patterns. In frontend/public/style.css (or equivalent):
/* Prevent horizontal scrolling */body {  overflow-x: hidden;}
/* Touch-friendly tap targets */button {  min-height: 44px;  min-width: 44px;}
/* Respect the iOS safe area (notch, home indicator) */body { padding-top: env(safe-area-inset-top); padding-bottom: env(safe-area-inset-bottom); padding-left: env(safe-area-inset-left); padding-right: env(safe-area-inset-right);}Use build tags to add platform-specific behaviour without cluttering shared code.
Create mobile_ios.go for iOS-only code:
//go:build ios
package main
import "github.com/wailsapp/wails/v3/pkg/application"
func platformOptions() application.IOSOptions {    return application.IOSOptions{        DisableBounce: true,    }}
Create mobile_android.go for Android-only code:
//go:build android
package main
import "github.com/wailsapp/wails/v3/pkg/application"
func platformOptions() application.AndroidOptions {    return application.AndroidOptions{}}
Create mobile_desktop.go as a stub so the shared code compiles on desktop too:
//go:build !ios && !android
package main
type mobileOptions struct{}
func platformOptions() mobileOptions { return mobileOptions{} }The IOS.* and Android.* runtime objects only exist on their respective platforms. Calling them on desktop throws. The right pattern — used by the Kitchen Sink — is to detect the platform once and hide mobile-only controls entirely:
// Detect platform from the bridge the host injects into the WebViewconst platform = (() => {  if (typeof window.wails?.platform === 'function') return window.wails.platform(); // Android  if (window.webkit?.messageHandlers?.external) return 'ios';  return 'desktop';})();
const isIOS     = platform === 'ios';const isAndroid = platform === 'android';const isMobile  = isIOS || isAndroid;
// Hide any element marked as mobile-onlydocument.querySelectorAll('.mobile-only').forEach(el => {  el.style.display = isMobile ? '' : 'none';});
Then in your HTML:
<section class="mobile-only"> <button id="btnHaptic">Haptic feedback</button></section>This way mobile-only buttons are never rendered on desktop, and you never need to guard every individual call with an if (isMobile) check.
On the Go side, pair this with a build-tag stub so the event handlers are only registered on the platforms that need them:
//go:build !ios && !android
package main
import "github.com/wailsapp/wails/v3/pkg/application"
// No-op on desktop — mobile tabs are hidden in the frontend so these// events are never emitted.func registerNativeFeatures(app *application.App) {}//go:build ios
package main
import "github.com/wailsapp/wails/v3/pkg/application"
func registerNativeFeatures(app *application.App) { app.Event.On("common:haptic", func(e *application.CustomEvent) { // only compiled and called on iOS application.IOS.Haptic("medium") }) // ... other handlers}This is the exact pattern the Kitchen Sink uses — see native_features_stub.go, native_features_ios.go, and native_features_android.go.
import { IOS } from '@wailsio/runtime';
async function onButtonTap() { if (isIOS) { await IOS.Haptics.Impact({ style: 'medium' }); } // ... rest of your handler}import { Android } from '@wailsio/runtime';
async function onButtonTap() { if (isAndroid) { await Android.Haptics.Vibrate(50); // 50ms }}Simulator build (for testing on simulator, no signing needed):
wails3 task ios:packagewails3 task ios:deploy-simulatorDevice build (requires a signing identity and provisioning profile):
wails3 task ios:package \  IOS_PLATFORM=device \  CODESIGN_IDENTITY="Apple Development: You (TEAMID)" \  PROVISIONING_PROFILE=path/to/profile.mobileprovision
wails3 task ios:deploy-device   # installs via xcrun devicectl
Distribution IPA (for App Store or TestFlight):
wails3 task ios:package:ipa IOS_PLATFORM=device \ CODESIGN_IDENTITY="..." \ PROVISIONING_PROFILE=path/to/distribution.mobileprovisionDebug APK (signed with the Android debug keystore, installs directly):
wails3 task android:packagewails3 task android:deploy-emulatorRelease APK (signed with your own keystore):
ANDROID_KEYSTORE_FILE=/path/to/release.jks \ANDROID_KEYSTORE_PASSWORD=yourpassword \ANDROID_KEY_ALIAS=youralias \ANDROID_KEY_PASSWORD=yourkeypassword \ wails3 task android:packageUniversal APK (arm64 + x86_64 in one file):
wails3 task android:package:fatwails3 task ios:run fails with “no iOS SDKs found”Full Xcode must be installed and selected:
sudo xcode-select -s /Applications/Xcode.app/Contents/Developerxcode-select -p # should print the Xcode pathwails3 task android:run fails with “SDK not found”Ensure ANDROID_HOME is set and exported. Verify with:
echo $ANDROID_HOMEls $ANDROID_HOME/platform-tools/adbList available simulators and boot one manually:
xcrun simctl list devices availablexcrun simctl boot "iPhone 16"chrome://inspect shows no targetsThe WebView must be in debug mode (the default for android:run). Make sure you’re running a debug build, not a production one. Also confirm adb devices shows the emulator as connected.
Make sure your HTML includes the viewport meta tag:
<meta name="viewport" content="width=device-width, initial-scale=1, viewport-fit=cover">Once your first app is running, the Kitchen Sink example is the fastest way to learn what else is possible. It’s a complete Wails app that runs on iOS, Android and desktop from a single codebase, covering haptics, geolocation, biometrics, local notifications, secure storage, and more:
git clone https://github.com/wailsapp/wails.gitcd wails/v3/examples/mobile
wails3 task ios:run        # iOS Simulatorwails3 task android:run    # Android Emulatorwails3 task run            # Desktop
Browse the source at v3/examples/mobile — the native_features_ios.go and native_features_android.go files are particularly useful as copy-paste starting points for platform-specific features.
iOS Guide
Full reference: configuration options, native tabs, WKWebView toggles, device builds, signing.
Android Guide
Full reference: configuration, toasts, Play Store packaging, NDK details.
Kitchen Sink source
Haptics, geolocation, biometrics, notifications, secure storage — all in one runnable app.